Configuring a Custom Domain for a Boomi-Managed Developer Portal
Overview
The API Control Plane allows you to replace the default tenant-specific portal URL, https://<tenantID>.na.controlplane.boomi.com/, with a custom domain you own — for example, developer.yourcompany.com. You configure the custom domain in the Developer Portal settings, add a private X.509 certificate created in Boomi Integration, and complete DNS configuration. Once active, the portal serves your certificate using Server Name Indication (SNI).
Prerequisites
Before you configure a custom domain, make sure you have:
-
Administrator access to the Boomi API Control Plane
-
A custom domain that you own and control — wildcards are not supported; you must use a specific fully qualified domain name (FQDN)
-
A private X.509 certificate created in Boomi Integration and issued from a publicly trusted certificate authority. If one doesn't exist, you must create it before configuring the custom domain. For more information, refer to Certificate components.
noteIf you are using a Subject Alternative Name (SAN) certificate, you must import it via the UI. It cannot be imported via the API at this time.
-
If you want your users to log into the Developer Portal via the Login with Boomi Platform button, you must configure your own Identity Provider (IDP) in Boomi. You must add
https://backend.na.controlplane.boomi.com/login/boomi/response(US) orhttps://backend.gb.controlplane.boomi.com/login/boomi/response(GB) as an SSO redirect URL on your IDP. Refer to SSO Options for more information.
Key concepts
-
Custom domain A fully qualified domain name that you own and configure to serve your Developer Portal instead of the default Boomi-hosted URL.
-
Private X.509 certificate The certificate the API Control Plane uses to establish a trusted HTTPS connection for your custom domain. This must be a private X.509 certificate created in Boomi Integration. For more information, see Certificate components.
-
Server Name Indication (SNI) A TLS extension that lets the server present the correct SSL certificate based on the domain the client is requesting. The API Control Plane uses SNI to serve your uploaded certificate when users access your custom domain.
-
CNAME record A DNS record that maps your custom domain to the Boomi-hosted Developer Portal infrastructure endpoint.
Configuring a custom domain for a Developer Portal
Open the custom domain settings
- In the API Control Plane, go to Configuration > Developer Portals.
- Select the Developer Portal you want to configure.
- On the General Info page, scroll down to the Custom Domain section.
Enable the custom domain and enter your settings
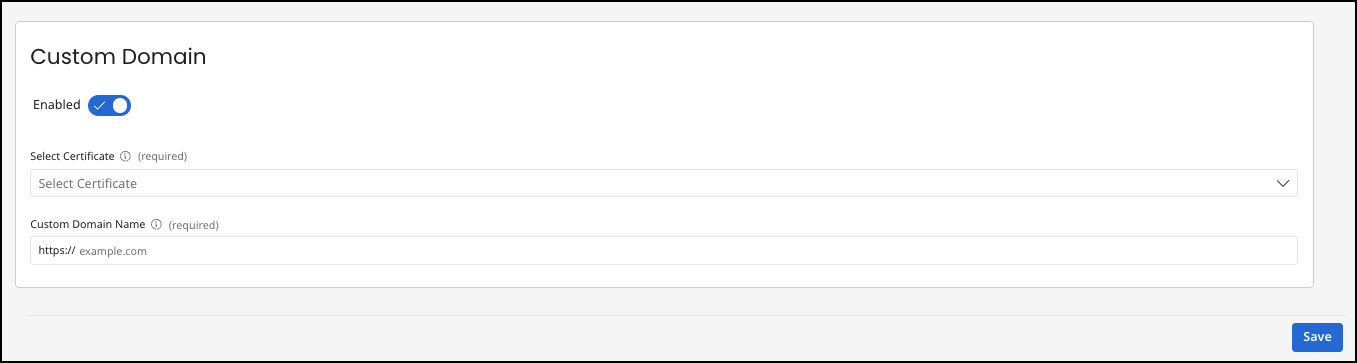
-
Select the Enabled toggle.
-
From the Select Certificate dropdown, select the certificate to use for this domain. The certificate must be created in Boomi Integration before it appears here. For more information, see Certificate components.
-
In the Custom Domain Name field, enter the URL you want to use, for example,
developer.yourcompany.com. The field is prefixed withhttps://. -
Select Save. The system validates your domain and certificate, then begins the ownership verification flow. It checks that the CNAME record is added to your DNS configuration. When complete, a success message displays: DNS Record Verified.
-
Open the developer portal URL in your browser.
It can take several minutes for your developer portal to become active.
Managing your custom domain
After setup, the Custom Domain section serves as a management dashboard where you can view your active domain, SSL certificate details (issuer and expiration date), and any alerts about certificates nearing expiration.
You cannot delete a certificate that is being used by any API Control Plane Developer Portal.
View Certificate
When you select View Certificate, the certificate component opens in Boomi Integration.
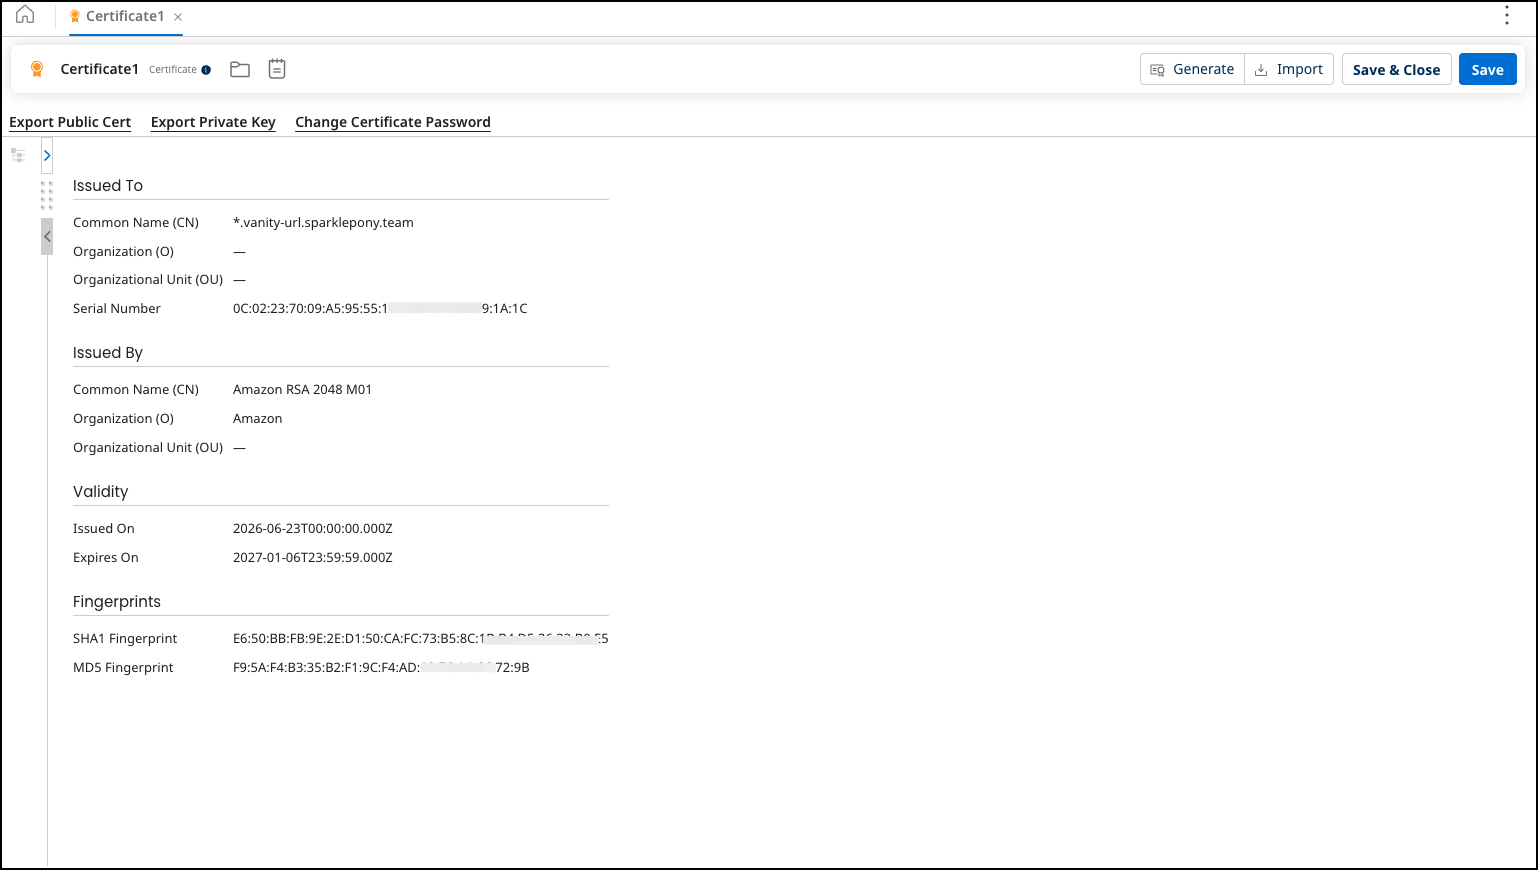
Check for Updates
Selecting Check for Updates gets any updates to the certificate. It will display the expiration date of the certificate. If it is expired, you must update the certificate.
Updating your certificate
Boomi sends email notifications 30, 14, 7, and 1 day before your certificate expires, and again after the certificate expires.
- From API Control Plane, select View Certificate to open Boomi Integration.
- Import and save a new certificate. A message displays that the certificate is used by a developer portal and asks you to confirm sending the updated certificate to the API Control Plane. Select Send Updated Certificate.
- Refresh API Control Plane and the updated certificate is active.
